

Webflow Cookie Consent in 2026: 7-Step GDPR Implementation Guide
Published Keyword: webflow cookie consent
Executive Summary
Webflow websites face unique cookie consent challenges because the platform provides no native consent management solution. As the EDPB’s 2026 Coordinated Enforcement Framework targets transparency obligations across 25 EU data protection authorities, Webflow site owners must implement compliant third-party CMPs with proper script blocking to avoid fines reaching €20 million or 4% of global turnover. This guide provides a step-by-step implementation process based on current regulator guidance and Webflow’s developer documentation.

Why Webflow Cookie Consent Demands Attention in 2026
| Risk Factor | 2026 Reality | Impact | |————-|————–|——–| | No Native CMP | Webflow relies on custom code or apps | Full burden on site owner | | EDPB Enforcement Focus | 25 DPAs auditing transparency (Art. 12-14) | Higher investigation probability | | Consent Mode v2 Mandate | Required for Google Ads/GA4 in EEA | Broken tracking without proper setup | | Staging Domain Complexity | .webflow.io subdomains need special handling | Test/prod parity issues |
“The EDPB’s 2026 coordinated enforcement action on transparency and information obligations means cookie consent mechanisms will be under direct supervisory scrutiny across Europe.” – EDPB News, March 2026
7-Step Webflow GDPR Cookie Consent Implementation
Step 1: Audit Every Tracker on Your Webflow Site
Before installing any CMP, document what your site actually loads:
- Open DevTools → Application → Cookies → Check your live domain (not .webflow.io)
- Identify every script in Network tab that sets cookies or uses localStorage
- Categorize each tracker: Essential, Analytics, Marketing, Functional, Preferences
- Note Webflow-native cookies:
wf_*session cookies, analytics cookies if Webflow Analyze is enabled
Pro tip: Webflow’s own Analyze feature sets cookies that require consent unless configured as essential. Check Project Settings → Apps → Analyze.
Step 2: Choose a Webflow-Compatible CMP
Not all CMPs work equally well with Webflow’s architecture. Prioritize these features:
| Feature | Why It Matters for Webflow | |———|—————————| | Pre-consent script blocking | Prevents GA4, Meta Pixel, Hotjar from firing before consent | | Google Consent Mode v2 support | Required for conversion modeling in GA4/Ads | | Webflow App or simple script injection | Head code injection via Project Settings → Custom Code | | Geo-targeting (EEA-only banners) | Avoids unnecessary friction for non-EU visitors | | Audit-ready consent logs | Article 30 compliance; export for DPA requests |
Recommended CMPs with verified Webflow integration (per Webflow Apps marketplace and developer docs):
- Consent Pro by Finsweet — Native Webflow App, visual Designer integration, automatic script blocking
- CookieHub — Custom code integration, auto-blocking, consent logs, Google Consent Mode v2
- Enzuzo — Webflow App install, free tier available, geo-targeting
- Usercentrics Cookiebot CMP — Google-certified, automated scanning, Webflow-compatible
- Cookie-Script — Google-certified CMP, custom code integration
Step 3: Inject CMP Script in the Correct Load Order
Script load order determines whether blocking actually works:
- Go to Project Settings → Custom Code → Head Code
- Paste CMP script FIRST — before any analytics, marketing, or chat widgets
- Move existing GA4/GTM scripts to fire after CMP initialization (or route through CMP)
- Save and publish to staging — test on
yoursite.webflow.iofirst
“The CMP script must be the first script in
to intercept and block subsequent trackers.” – Webflow Developer Documentation, Consent Management reference
Step 4: Configure Cookie Categories and Script Blocking
Inside your CMP dashboard, map every identified tracker:
| Category | Default State | Example Scripts to Block | |———-|—————|————————-| | Essential | Always ON (no toggle) | Webflow session (wf_*), security, load balancer | | Analytics | OFF until consent | GA4, Webflow Analyze, Matomo, Hotjar | | Marketing | OFF until consent | Meta Pixel, Google Ads, TikTok Pixel, LinkedIn Insight | | Functional | OFF until consent | Chat widgets (Intercom, Crisp), video players, maps | | Preferences | OFF until consent | Language selectors, theme preferences |
Enable Google Consent Mode v2 in CMP settings if using GA4 or Google Ads — this sends ad_storage, analytics_storage, ad_user_data, ad_personalization signals automatically.
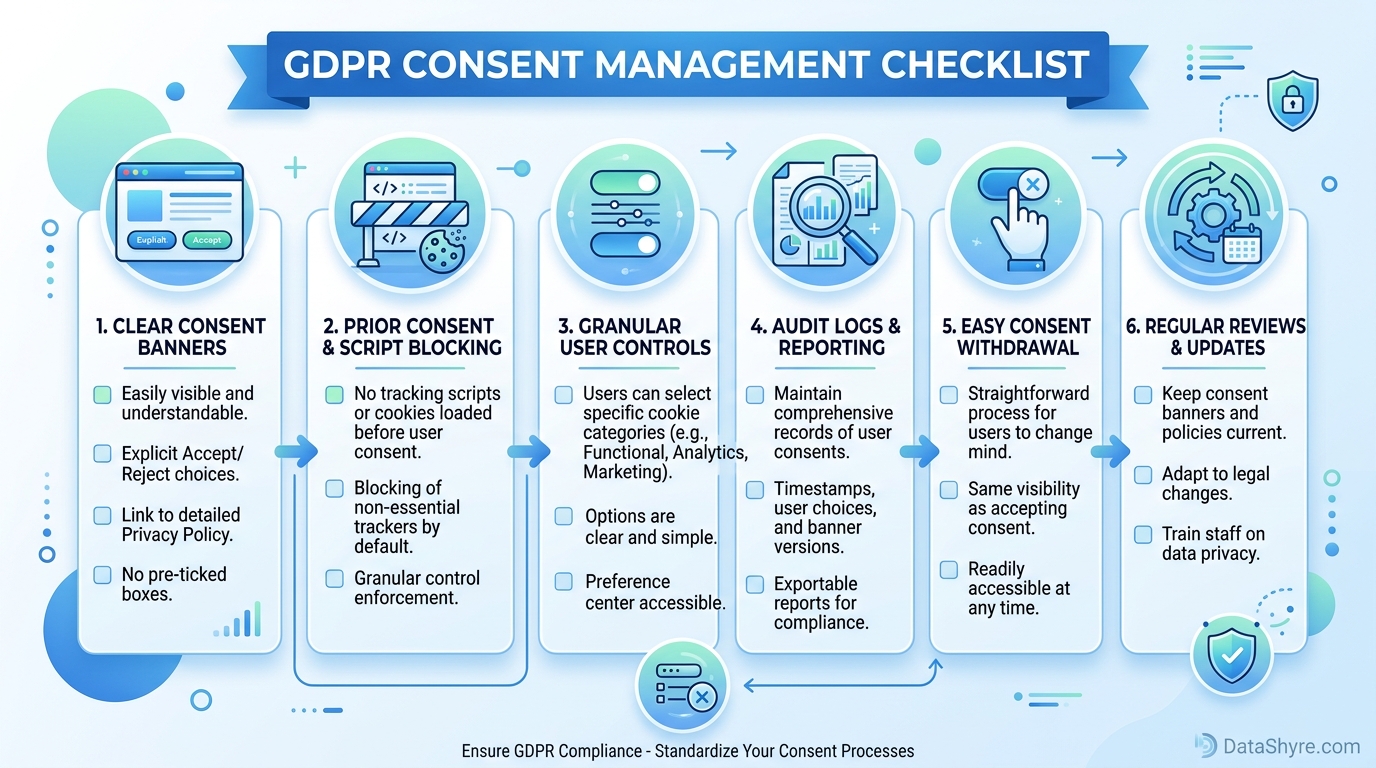
Step 5: Design a Compliant Banner UI (EDPB Guidelines 05/2020)
The EDPB’s 2026 enforcement focus includes dark pattern detection. Your banner must:
- Equal button prominence — “Accept All” and “Reject All” same size, color, weight
- No pre-ticked boxes — All non-essential categories start OFF
- Clear purpose descriptions — Plain language: “Analytics cookies help us understand how visitors use our site”
- Visible “Manage Preferences” link — Accessible at all times, not hidden behind menus
- Persistent withdrawal — Floating icon or footer link to reopen preferences anytime
Step 6: Test Across All Scenarios
Validation checklist before going live on production domain:
- [ ] Incognito/Private mode — Clean slate, no existing cookies
- [ ] Pre-consent state — Zero analytics/marketing cookies on initial load
- [ ] Reject All flow — Only essential cookies remain; GA4/Ads blocked
- [ ] Partial consent — Accept Analytics only → Marketing scripts still blocked
- [ ] Withdrawal works — Reopen banner, change choices, verify cookies update
- [ ] Production domain test — Not just .webflow.io (subdomain may bypass geo-targeting)
- [ ] Mobile responsive — Banner usable on 320px width, no horizontal scroll
- [ ] Google Consent Mode verification — Check
gtag('consent', 'update')fires correctly in console
Step 7: Set Up Ongoing Monitoring
GDPR compliance is continuous, not one-time:
- Monthly automated scan — Use CMP’s built-in scanner or tools like CookieHub’s scanner
- Quarterly manual audit — Re-run DevTools check after Webflow updates or new integrations
- Consent log retention — Export monthly; retain minimum 2 years per Article 30
- CMP changelog watch — Subscribe to provider updates for GDPR/EDPB adaptation
- Legal review annually — Confirm banner text and categories match current guidance
Internal Resources for Deeper Implementation
- GDPR Cookie Consent Requirements in 2026 — 7 live checks for compliant banners
- Google Consent Mode in 2026 — 7 live checks before you trust the setup
- Cookie Consent Banner Live Site Checklist — 7 essential validation items
- Consent Management Platform in 2026 — 7 live checks before you trust a CMP
Common Webflow-Specific Pitfalls to Avoid
| Pitfall | Consequence | Fix | |———|————-|—–| | CMP script loads after GA4 | GA4 fires pre-consent, illegal data collection | Move CMP to first position in Head Code | | Testing only on .webflow.io | Geo-targeting may not trigger; false confidence | Always test on production custom domain | | Forgetting Webflow Analyze cookies | Native analytics sets cookies without consent | Disable Analyze or categorize as Analytics in CMP | | No Consent Mode v2 with GA4/Ads | Lost conversion modeling, policy violation | Enable in CMP; verify ad_storage/analytics_storage signals | | Hardcoded scripts in Embed blocks | Bypasses CMP blocking entirely | Move all third-party scripts to CMP-managed tags or GTM |
Conclusion
Webflow’s flexibility comes with the responsibility to build your own consent layer. By following this 7-step process — audit, select, inject, configure, design, test, monitor — you create a defensible compliance posture that satisfies both the GDPR’s legal requirements and the EDPB’s 2026 enforcement priorities. The investment in proper CMP integration pays dividends in reduced legal risk, maintained analytics integrity, and preserved user trust.
Published: August 31, 2026